You remember liking a frame on the camera screen, but a week later you cannot explain why the next shot feels flatter. These photography journal ideas give the missing details a home: the light you noticed, the choice you made and the change you want to test next.
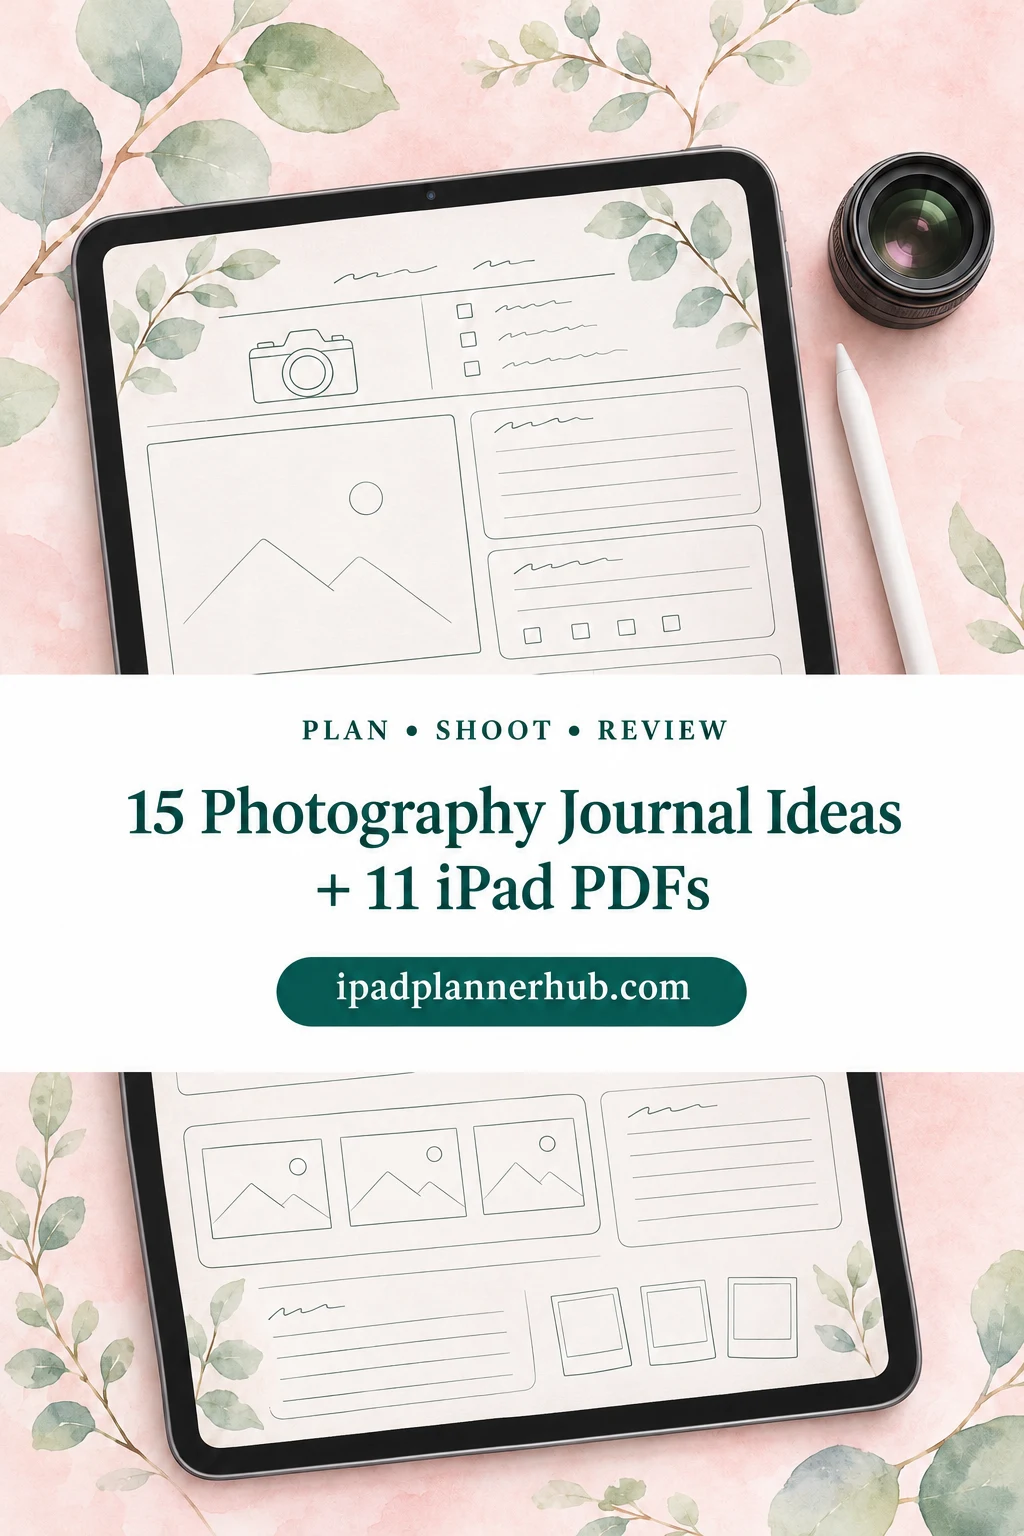
A photo journal combines images with words; a photo diary can preserve the story of a day, while a photographer’s working journal can explain the decisions behind a frame. Photo journaling here centers on a repeatable shooting record, rather than a beautiful page for every picture. Start with one question, then choose a notebook that leaves room for the answer.
11 Adaptable iPad PDFs for Shooting Notes
The options below are general notebooks, journals and page sets you can adapt in a PDF annotation app. None supplies the fifteen photography prompts that follow, reads camera settings automatically or replaces your photo library. I kept distinct page structures, from a five-section practice notebook to monthly review pages, so you can choose by the way you organize a shoot.
TL;DR: Choose a blank or grid notebook for framing sketches, project sections for separate series, or ruled pages for shoot reflections. These eleven general iPad options need your own photographic headings; none is a camera-connected log.
Quick Picks
- Best for planning one shoot: Project Planner – Printable & Digital
- Best for sketching a frame: Digital Notebook
- Best for a focused practice set: Digital Notebook 5 Hyperlinked Tab
- Best for separate photo series: Digital Notebook Hyperlinked Goodnote
- Best for a larger project archive: Digital Notebook 24 Hyperlinked Tab
- Best for adding your own shot-list pages: Digital Notebook Papers – GoodNotes
- Project Planner – Printable & Digital – Best for planning one shoot
- Digital Notebook – Best for sketching a frame
- Digital Notebook 5 Hyperlinked Tab – Best for a focused practice set
- Digital Notebook Hyperlinked Goodnote – Best for separate photo series
- Digital Notebook 24 Hyperlinked Tab – Best for a larger project archive
- Digital Notebook Papers – GoodNotes – Best for adding your own shot-list pages
- Dark Mode Digital Notebook – Gold Theme – Best for a dark writing background
- Digital Ruled Journal – Best for dated shoot reflections
- Digital GoodNotes Journal – Art Deco – Best for monthly session reviews
- DaisyNotes | Digital Notebook | Purple – Best for a simple written caption log
- Undated Cute Orange Bullet Journal – Best for a small visual session recap
Plan the Shoot Before Picking Up the Camera
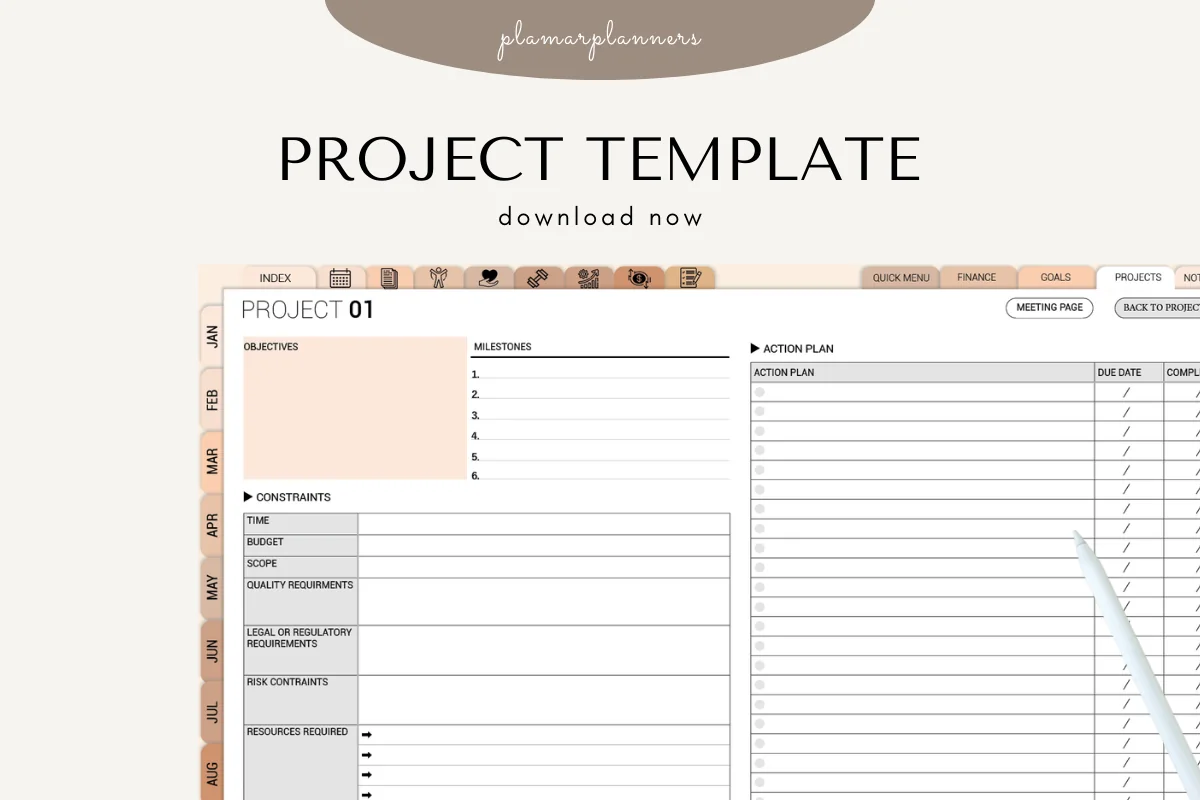
Best for planning one shoot
1. Project Planner – Printable & Digital
Orientation: LandscapeLayouts: Project overview; milestones; action plan
Best for: turning one photographic intention into an action list. Designed by Plamarplanners.
- Project overview with objectives, constraints and resources
- Milestone and action-plan fields visible in the previews
- Digital use in GoodNotes, Notability or Xodo described
A shoot can fail before you take a picture if the aim is too vague. This overview gives you a place to write a small brief, list constraints and decide what must happen next. I would reserve the objective box for one sentence, such as showing the same doorway in two kinds of light. The visible layouts repeat the project overview in different colors; this is a compact brief, not seven separate photography worksheets. Add camera settings and shot lists yourself. I have not tested the PDF navigation.
Keep Sketches and Photo Series in Separate Sections
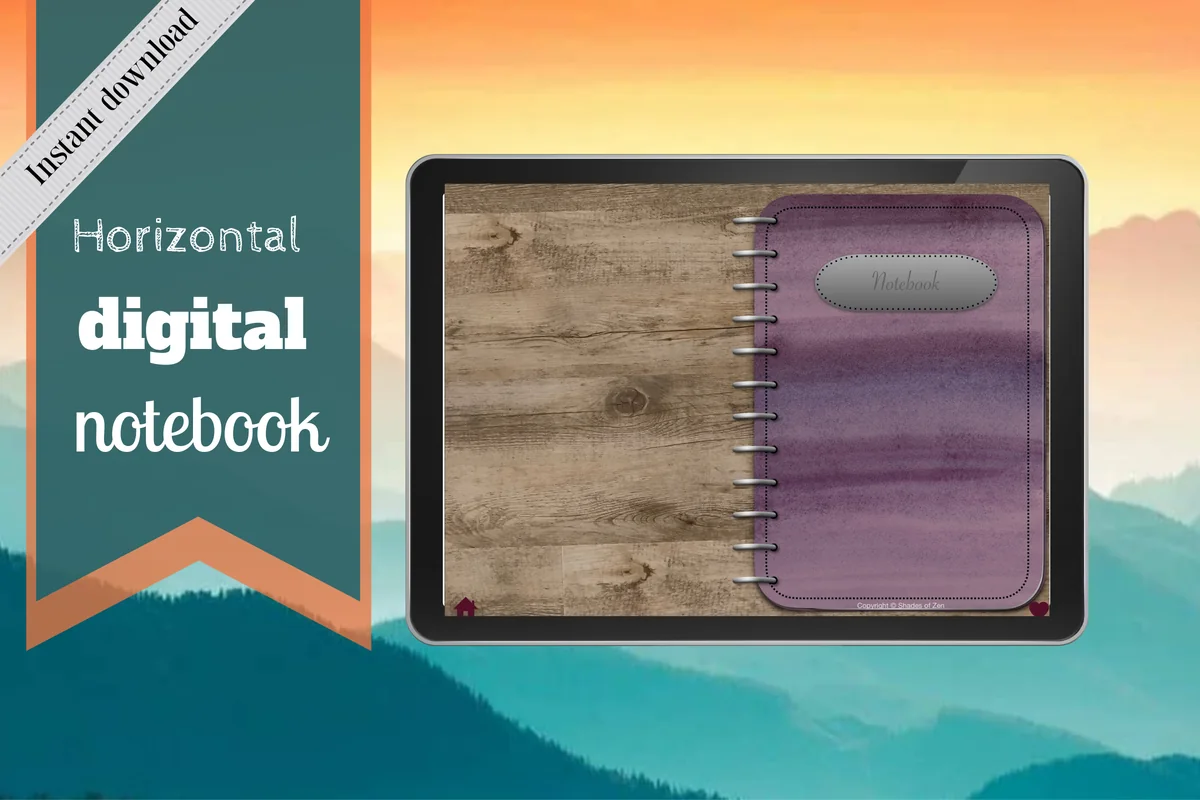
Best for sketching a frame
2. Digital Notebook
Orientation: LandscapeLayouts: 12 sections; 16 note templates
Best for: putting a composition sketch beside an explanation. Designed by Shades of Zen.
- 12 expandable sections with linked tabs
- 16 note templates including blank, dots, graph and Cornell notes
- Instructions for importing into GoodNotes
This is my strongest general option for a visual notebook. A blank page leaves room for a small framing sketch, while a two-column page can hold intention on the left and the result on the right. Give each series its own section and keep the original file ID beside every pasted image. The horizontal spread and visible rings are worth checking before choosing it for large pictures. Use the general note layouts to build the photographic headings you need.
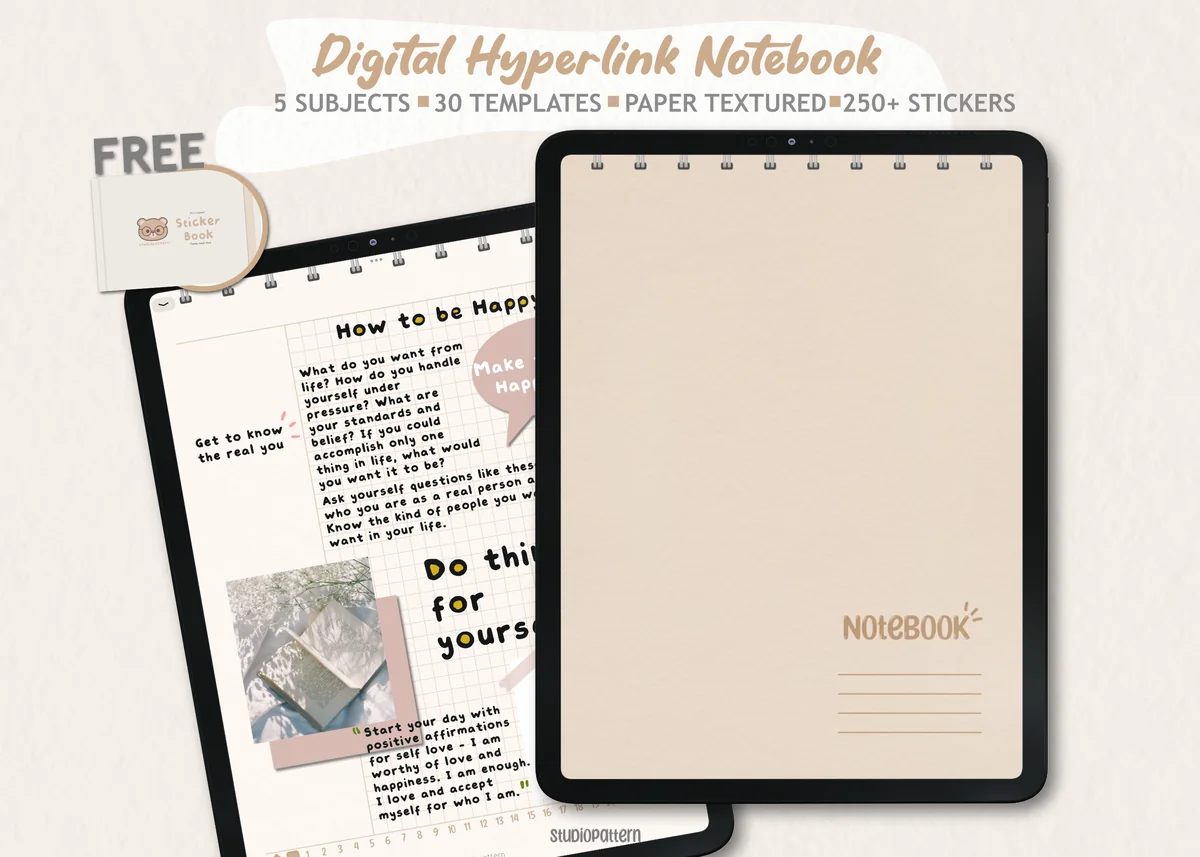
Best for a focused practice set
3. Digital Notebook 5 Hyperlinked Tab
Orientation: PortraitLayouts: 5 sections; 30 note templates
Best for: separating a few recurring exercises. Designed by studiopattern.
- 5 section dividers and a contents page
- 30 note-taking templates
- Hyperlinked PDF, manual and GoodNotes sticker book
Five sections can be a useful boundary: one for light, one for framing, one for a current series, one for reviews and one for the next experiment. That organization is my suggestion, not an included course. The previews show blank, ruled, grid and dotted papers alongside general planning pages. Choose this smaller section count when you want a few working folders rather than an extensive archive. Start with one exercise per section and reuse the same headings for each attempt.
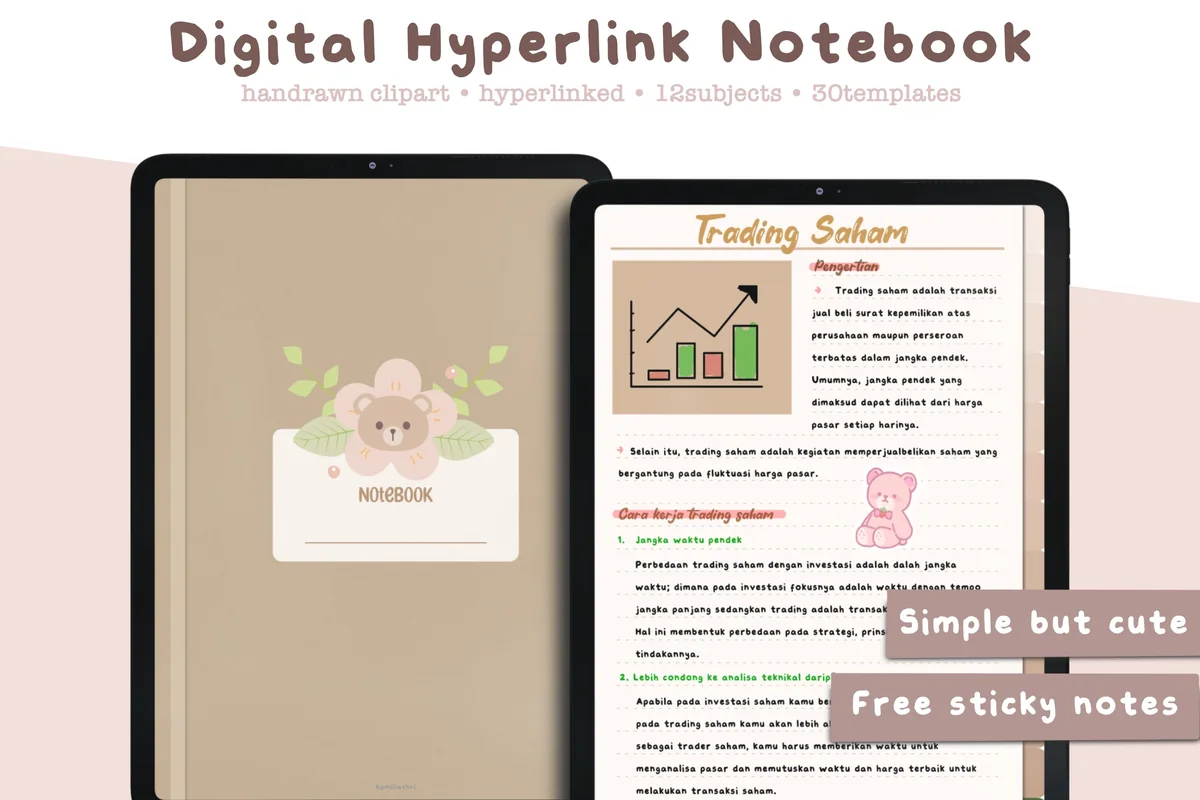
Best for separate photo series
4. Digital Notebook Hyperlinked Goodnote
Orientation: PortraitLayouts: 12 sections; 30 paper templates
Best for: keeping several creative projects apart. Designed by studiopattern.
- 12-section interactive PDF for GoodNotes and other PDF annotation apps
- 30 paper templates
- Precropped GoodNotes sticky notes and individual PNG files
The twelve folders suit a set of ongoing series better than a daily stream of unrelated pictures. I like the option to keep an intention page, selected frames and a review together behind one divider. The plant illustrations are decorative; they do not make this a nature-photography template. Compared with the five-section option, the reason to choose it is the larger number of projects you want to keep separate, not a claim of better photographs.
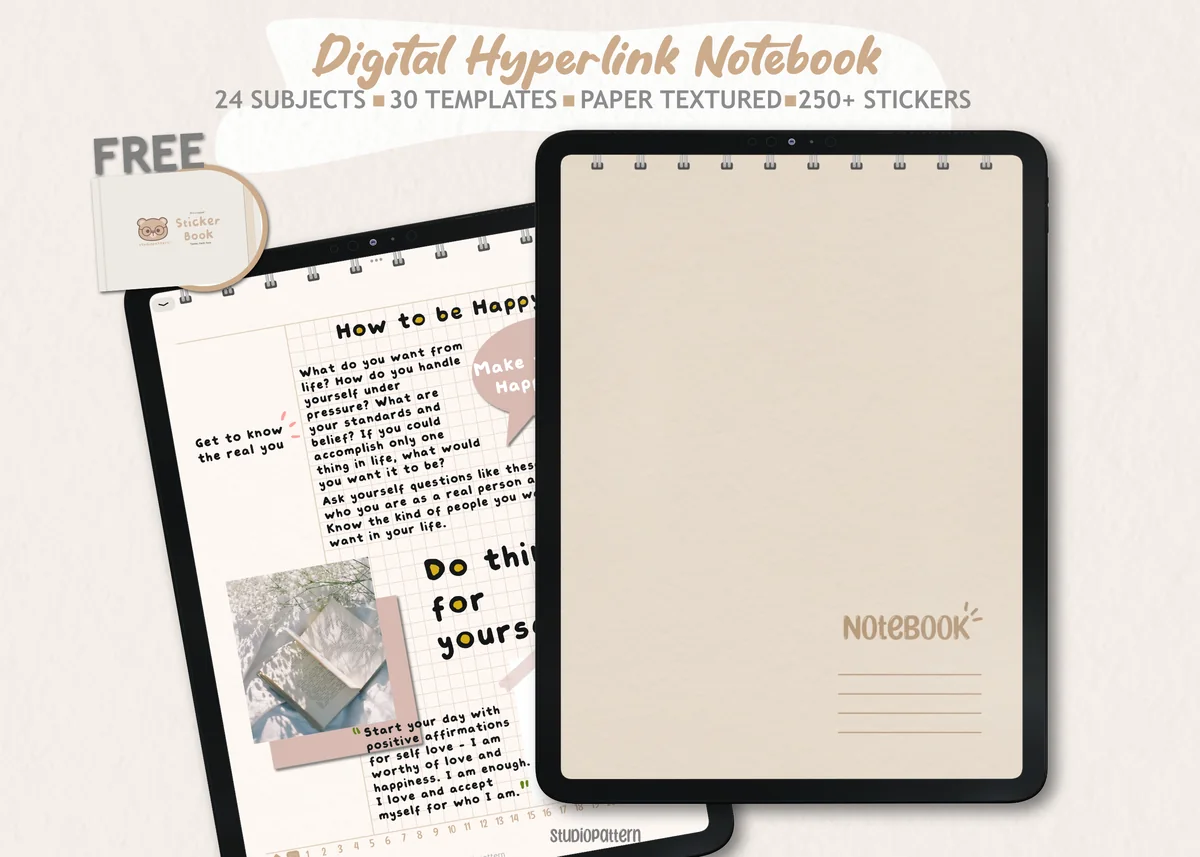
Best for a larger project archive
5. Digital Notebook 24 Hyperlinked Tab
Orientation: PortraitLayouts: 24 sections; 30 note templates
Best for: giving many named series their own section. Designed by studiopattern.
- 24 divider sections with a linked contents page
- 30 note-taking templates
- Hyperlinked PDF, manual and sticker files
This is the larger organizational choice. Twenty-four sections let you keep named projects apart without inventing a separate notebook for every one. The pale paper texture and blank or grid pages leave space for your own arrangements. Keep the names concrete, such as Window Light or Saturday Market, so the index tells you where a frame belongs. It is more structure than a first shoot needs, and the contents page will not automatically identify camera files.
Build Your Own Shooting-Notes Page
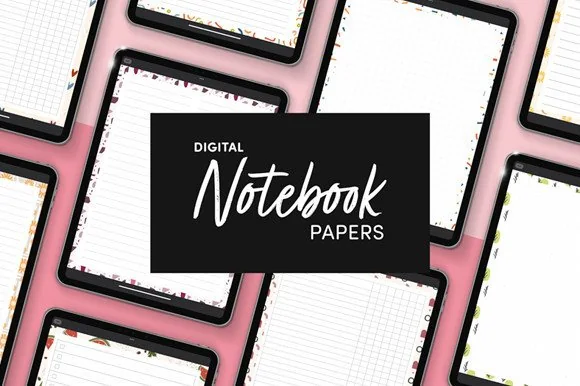
Best for adding your own shot-list pages
6. Digital Notebook Papers – GoodNotes
Orientation: PortraitLayouts: 9 designs; 8 layouts per design
Best for: building a page inside a notebook you already use. Designed by catsquills.
- 9 portrait paper designs
- 8 layouts per design including columns, numbered lists, dots and notes
- PNG and PDF files for GoodNotes or Notability
If you already have a notebook, another complete journal may be unnecessary. These papers provide a cleaner way to add a numbered shot list or a two-column review. The layouts are general, so label columns with the details you actually need instead of treating the habit tracker as an exposure chart. Keep decorative borders away from the image comparison area. This is a paper set, not a linked photography planner.
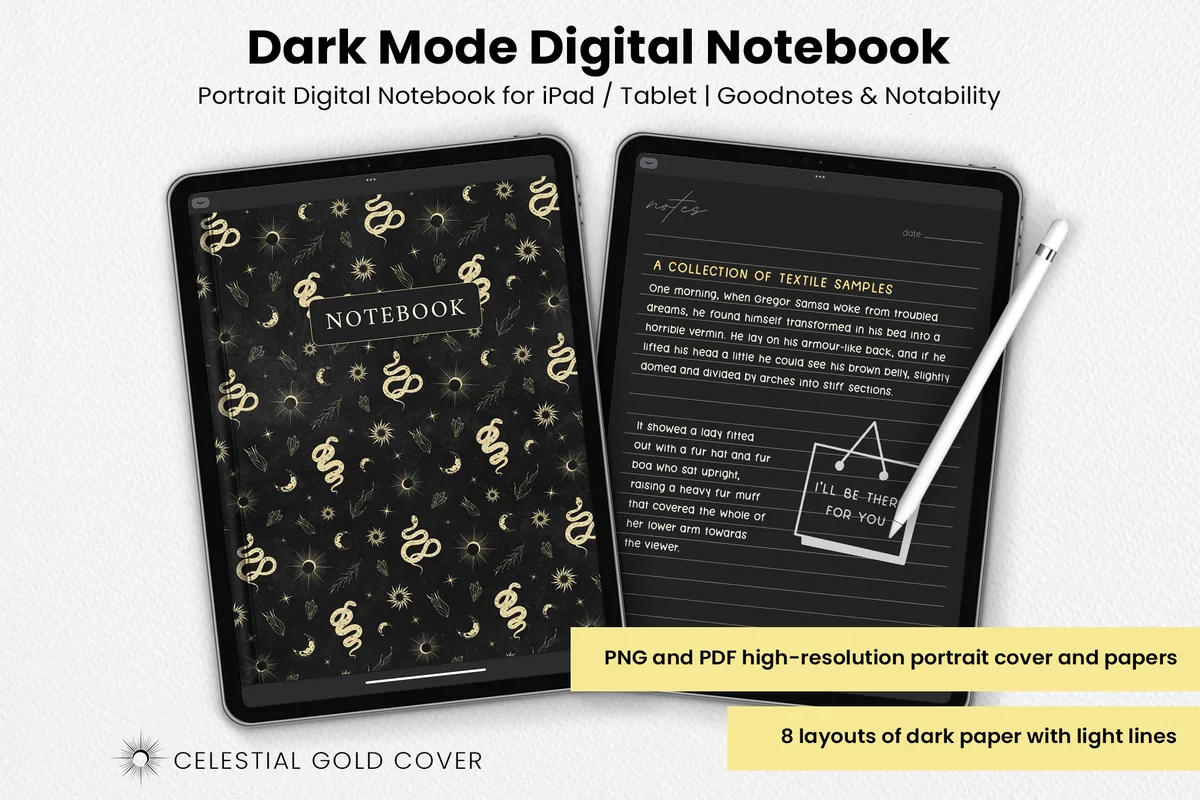
Best for a dark writing background
7. Dark Mode Digital Notebook – Gold Theme
Orientation: PortraitLayouts: 8 dark paper layouts
Best for: keeping text notes on dark pages. Designed by catsquills.
- 8 dark paper layouts including columns, lines, dots and notes
- Celestial gold cover
- PNG and PDF files for GoodNotes or Notability
Choose this for the writing surface if you prefer light ink on dark paper. The columns and list layouts can hold the same file IDs and next-test notes as the pale paper set. Review color and exposure in your usual photo viewer; use the dark page for written observations. The celestial cover is decoration, not a specialist journal section.
Write the Review After the Shoot
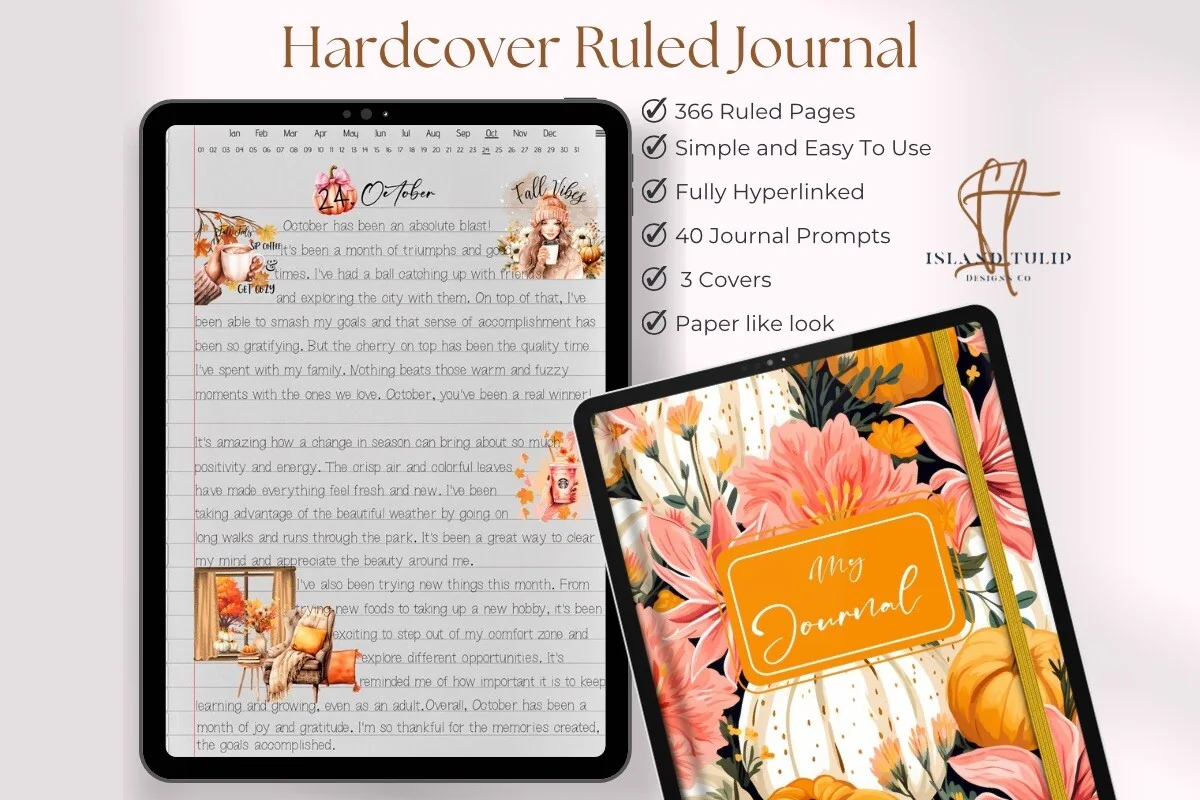
Best for dated shoot reflections
8. Digital Ruled Journal
Orientation: PortraitLayouts: 366 ruled pages; chronological navigation
Best for: writing what happened while details are fresh. Designed by Island Tulip Designs Co.
- 366 ruled pages and three cover choices
- Hyperlinked journal with month and day navigation shown
- 40 PNG and precropped GoodNotes journal prompts
Some sessions need a paragraph more than a contact sheet. The ruled pages suit a dated account of what you intended, what interrupted the plan and what you want to repeat. Write the project name and frame ID at the top because the navigation is chronological, not a ready-made index of photographic subjects. The included prompts are general journaling prompts; none is presented here as a photography lesson.
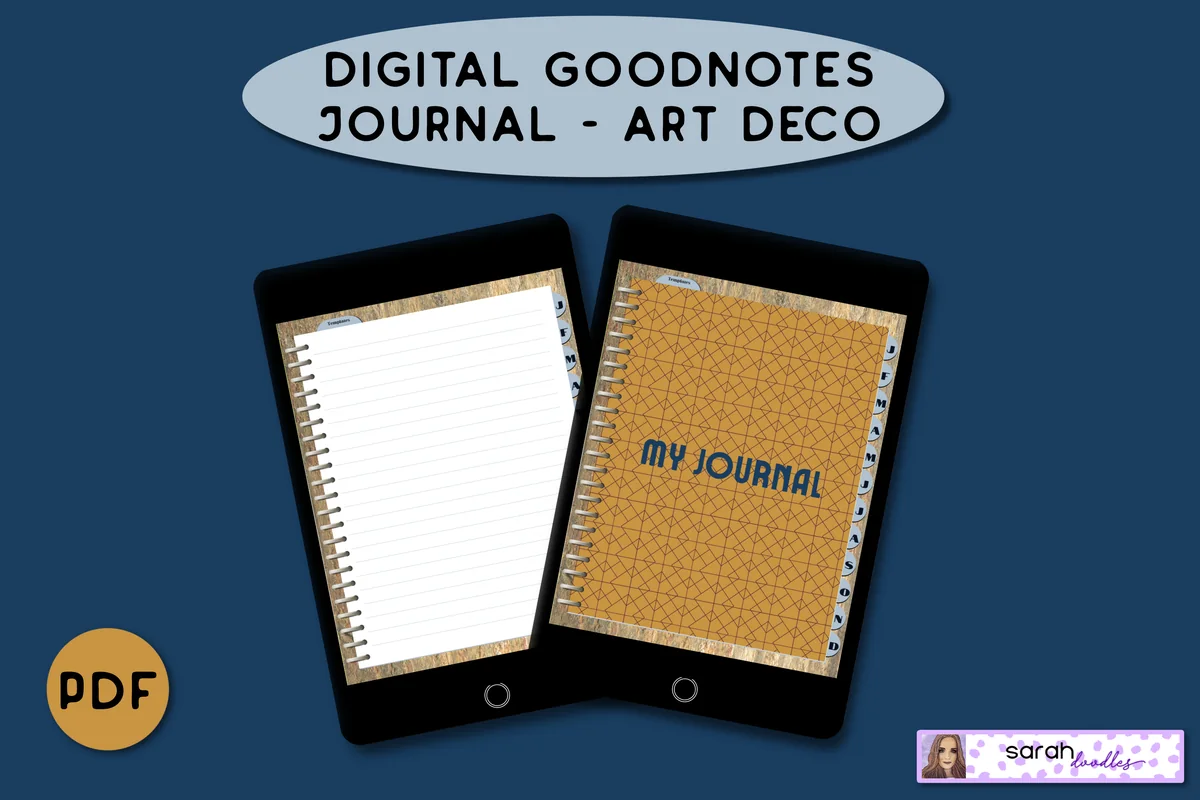
Best for monthly session reviews
9. Digital GoodNotes Journal – Art Deco
Orientation: PortraitLayouts: Monthly dividers; lined and brain-dump pages
Best for: collecting shoot notes by month. Designed by Sarah Doodles.
- Undated journal with hyperlinked monthly dividers
- 5 lined pages per month; additional pages can be duplicated in GoodNotes
- Brain-dump and priority pages
Month tabs make sense when you think in shooting sessions rather than long projects. Write a short entry after each outing, then use a brain-dump page to choose the question you will carry into the next month. The five starting pages per month are a useful limit to notice before buying. Duplicate a lined page when a month needs more entries; the listing describes this option in GoodNotes. I have not tested the purchased PDF or its links.
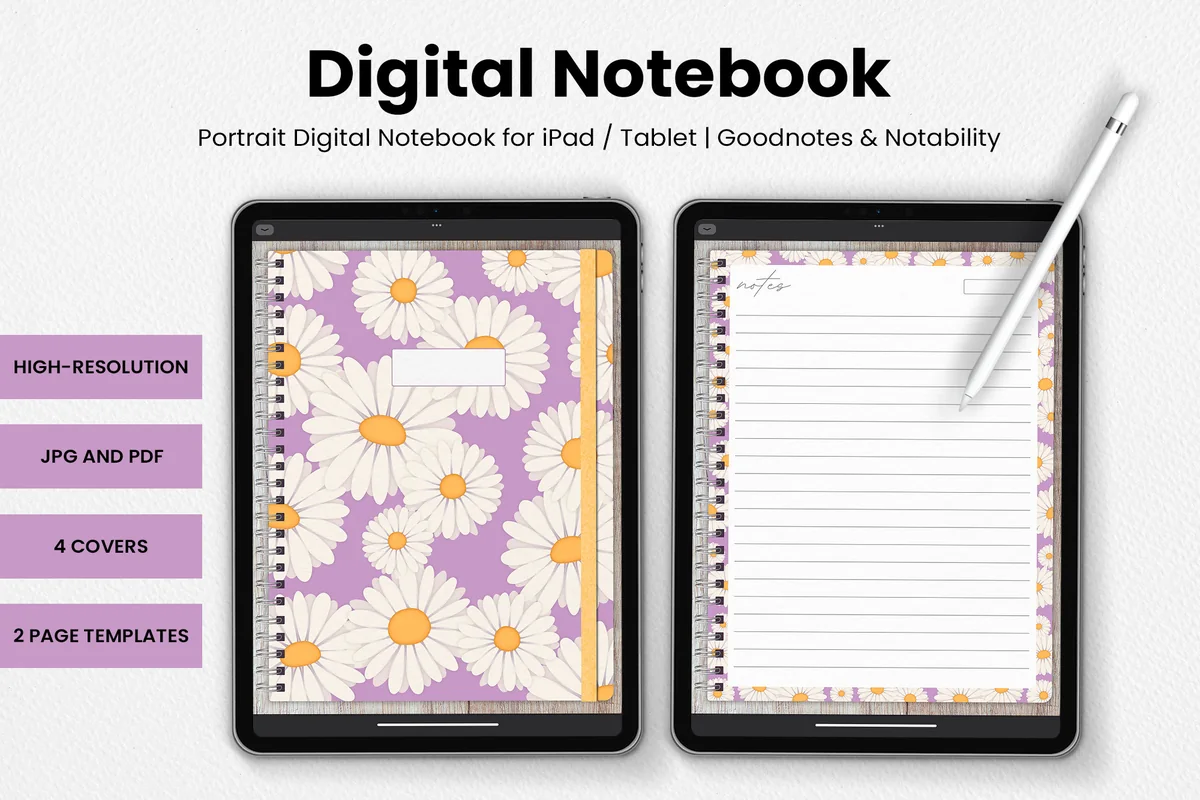
Best for a simple written caption log
10. DaisyNotes | Digital Notebook | Purple
Orientation: PortraitLayouts: 2 page templates; 4 covers
Best for: keeping short image notes without a section system. Designed by catsquills.
- 4 covers and 2 page templates
- Portrait notebook for GoodNotes or Notability
- JPG and PDF files with wood-texture backgrounds
DaisyNotes is the pared-back choice for someone who mainly wants to write. Put one file ID above a short caption and finish with a single sentence about the next attempt. Its small layout selection is the trade-off: you are choosing a consistent page, not extensive project navigation. The wood texture and daisy borders are visible in the previews, so check whether that background leaves enough visual quiet for your notes.

Best for a small visual session recap
11. Undated Cute Orange Bullet Journal
Orientation: LandscapeLayouts: Undated calendar; compact framed notes
Best for: combining one selected image with a short note. Designed by digitaliya_studio.
- Undated fill-in calendar and small decorated writing areas shown
- Interactive PDF bullet journal
- GoodNotes-format stickers
The small frames give this a different role from an open notebook: a compact recap of one session or one chosen picture. The undated calendar can hold your own shooting dates, while the writing boxes keep the reflection brief. The small writing areas leave little room for a detailed settings log or a large side-by-side comparison. Orange decorations and stickers take up space; they are a style preference, not a photographic feature.
Quick Comparison
| Option | Page structure | Photography use | Limit |
|---|---|---|---|
| 1. Project Planner – Printable & Digital | Project overview | A short series with a clear purpose | Compact fields; not a camera log |
| 2. Digital Notebook | 12 sections; mixed note layouts | Framing sketches and paired comparisons | Binder rings reduce central writing space |
| 3. Digital Notebook 5 Hyperlinked Tab | 5 sections; 30 templates | One folder per current exercise | No ready-made exposure records |
| 4. Digital Notebook Hyperlinked Goodnote | 12 sections; 30 templates | Separate series with a common page format | Decorated dividers; manual indexing |
| 5. Digital Notebook 24 Hyperlinked Tab | 24 sections; contents page | An index of many named projects | More folders to maintain |
| 6. Digital Notebook Papers – GoodNotes | Loose papers; columns and lists | Custom shot lists and written comparisons | Loose papers without linked sections |
| 7. Dark Mode Digital Notebook – Gold Theme | Dark pages; 8 layouts | High-contrast handwritten notes | Background is not a color-reference tool |
| 8. Digital Ruled Journal | Ruled pages; day navigation | A written debrief after each session | Less open space for framing diagrams |
| 9. Digital GoodNotes Journal – Art Deco | Month tabs; lined pages | A monthly review and next-session notes | Manual duplication for a busy month |
| 10. DaisyNotes | Digital Notebook | Purple | Simple ruled pages | Brief frame captions and observations | Few layouts; decorative background |
| 11. Undated Cute Orange Bullet Journal | Small framed pages; calendar | One selected image and a short recap | Tight space for detailed technical notes |
15 Photography Journal Ideas for the Next Shoot
Use these photography journal prompts as separate page ideas, not fifteen boxes to complete on every outing. For a first attempt, combine the intention, file ID and next-test prompts on one page. Add the other pages when they answer a real question about your pictures.
Before the shoot: give the frame a purpose1–5
- 1Write a one-sentence intention. Name what you want the viewer to notice: the shape of a shadow, the quiet of a room or the distance between two people. Under it, write what would count as a useful result. “Show the window light across the table” gives you something to review; “take better photos” leaves you guessing. Keep the sentence visible when you select the final frame.
- 2Sketch the location from above. Draw the subject, your proposed camera position and the direction the light seems to come from. A rough rectangle and a few arrows are enough. Mark your own viewpoint separately from the background so you can reconstruct the arrangement later. This is a working map, not a scale drawing; leave a blank corner for the position you actually used.
- 3Make a light-observation page. Note the time, the location and what you can see: direct sun, cloud cover, a bright window or a lamp. Describe the shadow edge in ordinary words. Add a small reference image and record any change during the session. Avoid turning one observation into a rule about that place; a later visit may look different.
- 4Turn an inspiration into a question. Beside a credited reference or your own earlier image, write the particular feature you want to investigate. Is it the low viewpoint, the negative space or the relationship between subject and background? Sketch your own version underneath. Keep the source name and URL with the note; the point is to study a choice and develop an interpretation, not to pass off another photographer’s image as yours.
- 5Build a short shot list with a reason. Divide a page into “frame to try” and “why it belongs.” A wide view might establish the setting; a detail might explain the activity. Leave a space for the resulting file ID beside each item. Cross out a planned frame when the scene changes rather than forcing the outing to match a list that no longer serves the story.
The planning page earns its space when it makes the review more precise. You can point back to an intention instead of deciding afterward that every accidental result was the plan all along.
During the shoot: preserve the useful details6–10
- 6Give each note a recoverable frame ID. Write the filename or another identifier you can find again, followed by the session label. If your camera reuses filenames, include a folder or date reference as well. Put the same identifier under a pasted preview. A thumbnail on its own may look familiar today but be hard to distinguish from a nearby frame next month.
- 7Record only the settings relevant to the test. When you deliberately change shutter speed, aperture or ISO, write the value beside the frame ID and say what you were trying to change. If you do not know a setting, leave it unknown until you check the original file. A phone session can use the same page with a note about the chosen camera mode instead of guessed numbers.
- 8Write what the image cannot explain. Note that you waited for a gap in the crowd, moved because of a distracting object or changed your plan when the subject left. This is where a working journal adds something beyond a picture and its camera data. Keep observed events separate from your interpretation: “cloud covered the sun” is different from “the scene felt calmer.”
- 9Compare two viewpoints on one spread. Place a small version of each frame at a similar viewing size and label them with their IDs. Describe one visible difference, such as the background edge or the amount of empty space. Then write which version better serves the intention. Do not call one angle universally better when the conclusion belongs to this subject and this particular purpose.
- 10Leave a question beside the uncertain frame. Instead of writing “bad photo,” name what you want to investigate: an unclear subject, a distracting bright patch or movement you did not intend. Add the file ID and one possible next test. The question should stay open until you look at the original image; a small journal preview is a reminder, not the place to judge every technical detail.
If taking notes interrupts the moment, write a few identifiers and finish the explanation afterward. A short record you can match to the right picture is more useful than a detailed description attached to the wrong one.
After the shoot: turn the pictures into a next step11–15
- 11Make a small contact-sheet page. Arrange a few selected previews in order and put the file IDs beneath them. Use the page to compare the sequence or see which images repeat the same job. You can assemble this manually with images in your annotation app; the notebooks do not create it for you. Keep the full-size originals in your photo storage rather than treating the journal grid as an archive.
- 12Choose one frame and defend the choice. Write why it serves the intention better than the nearest alternative. Point to something visible, such as a clearer separation or a gesture that completes the scene. Add one reservation as well. This turns “my favorite” into an explanation you can revisit, without pretending the selection is an objective ranking of every image you made.
- 13Use an intention-versus-result split page. Put your original sentence on the left and an observation about the chosen frame on the right. Where did they agree? Where did you follow something unexpected? Finish with one thing to keep and one thing to reconsider. Leave the initial intention unchanged so the page shows the actual comparison rather than a rewritten account of what you meant to do.
- 14Plan a return frame. Identify one scene worth revisiting and name the variable you intend to explore: position, timing or a different framing. Keep the earlier file ID on the new page. Record the conditions again when you return, because a location will not necessarily reproduce the same light. Compare what happened without claiming that a single changed variable explains every difference.
- 15Build an index of experiments. List the project name, the question, a representative frame ID and the page containing your conclusion. Add a final column for “next action” or “closed for now.” An index helps you return to a thread without rereading the whole diary. Review the open questions before starting another elaborate series, so the notebook supports taking pictures rather than becoming a separate organizing project.
Match the Page to the Question You Want to Answer
Match the layout to the question: open space for a framing diagram, paired columns for a comparison, or an index for finding a series again.
| Question | Page to use | What to keep visible |
|---|---|---|
| Where should I stand? | Blank or grid page | Camera position, subject and light direction |
| Which frame serves the idea? | Two-column comparison | Both frame IDs and the original intention |
| What happened on this outing? | Ruled session page | Date, unexpected changes and next test |
| Where did this experiment end? | Project section with an index | Question, selected frame and conclusion |
For photography journal ideas for beginners, a blank page with a few headings is enough. Keep the page system small until a real retrieval problem justifies more sections.
Build One Reusable Shooting Record on Your iPad
These are suggested headings you create yourself in your chosen PDF annotation app. They are not hidden features included with the products. App controls vary, so use the current help for the app you already have rather than expecting every PDF to behave like a dedicated photo diary app.
From blank page to useful review3 steps
- 1Choose a base page and label it. Use blank or grid paper for sketches, or a lined page for a written review. Add a session label, date and project name at the top. Leave room beside the title for the specific question you want to answer. Keep a clean version of these headings so you do not have to invent a new structure after every outing.
- 2Separate the plan from the evidence. Make a small intention area, a space for the frame ID and a larger space for the result. Add a preview only when it helps explain a choice. Keep your original files and their storage reference outside the journal, then write that reference beside the image. The PDF becomes a guide back to the work, not a second photo library.
- 3Close with one next action. Finish the page with “repeat,” “change” or “leave for now,” followed by a specific reason. If you plan another session, copy the unresolved question onto its page and keep the old review intact. Check that you can find both pages from your index before adding a complicated network of links you will need to maintain.
Keep the Journal Useful Without Turning It Into Another Feed
A private photo journal can hold an unfinished idea and an ordinary frame. It does not need the polish of a social media post. Judge a page by whether it helps answer the next photographic question.
- Use words for context. A short caption can explain the intention or the change you made without describing everything already visible in the image.
- Keep images purposeful. Add a comparison, a selected frame or a location reference; leave unrelated pictures in your photo collection.
- Preserve uncertainty. Mark an unknown setting or an untested explanation instead of filling the gap with a plausible number.
- Separate a travel story from a shooting experiment. A memory page might belong in your travel journal, while the camera position and repeat-frame notes belong here.
For the broader routine of learning a creative skill, the hobby journal ideas cover progress records beyond photography. Keep this working journal focused on images, conditions and choices so the two records have different jobs.
FAQ: Photography Notes and Photo Diaries
What is a picture journal called?
Photo journal and photo diary are both common names for a record that combines photographs and writing. Here the emphasis is a photographer’s working record: the idea behind a frame, the conditions and the review. A memory diary can put more emphasis on the experience itself.
Can I start with phone photos?
Yes. Use a recognizable image ID, a note about the scene and one question for the next attempt. You do not need to fill in camera settings you cannot verify. The journal is an arrangement of your pictures and notes, not a requirement to own a separate camera.
Do I need an entry for every photo?
No. Select the frames that answer a question or explain a decision. One session page can refer to several file IDs. If an entry contains no new observation and no useful link back to the work, you can leave it out.
Is a PDF notebook a photo organizer app?
No. These templates provide pages for manual notes and images in a compatible app. They do not promise camera imports, automatic EXIF capture, face recognition or photo-library management. Keep originals in your normal photo storage and use the notebook to record decisions about selected frames.
How can I make a page creative without hiding the photographs?
Use a small sketch, a short handwritten caption or one arrow that explains the composition. Leave clear space around the image you want to discuss. Decoration can set a mood, but it should not cover the visual detail you need for a comparison.
Return to One Frame With a Better Question
The photography journal ideas worth keeping are the ones that connect an observation to another attempt. Choose one image, recover its file ID and write what you were trying to show. Then decide what you will repeat or change. A short, honest page gives the next shoot a starting point; the other fourteen ideas can wait until you need them.
You May Also Like
This article contains affiliate links. If you buy through them, I may earn a commission at no extra cost to you. Read the affiliate disclosure.