The shelf is ordered, the receipt is in your email, and the wall measurement is on a scrap of paper you cannot find. These home project planner ideas bring those loose ends into one iPad notebook, so a small room update has a clear start and a finish.
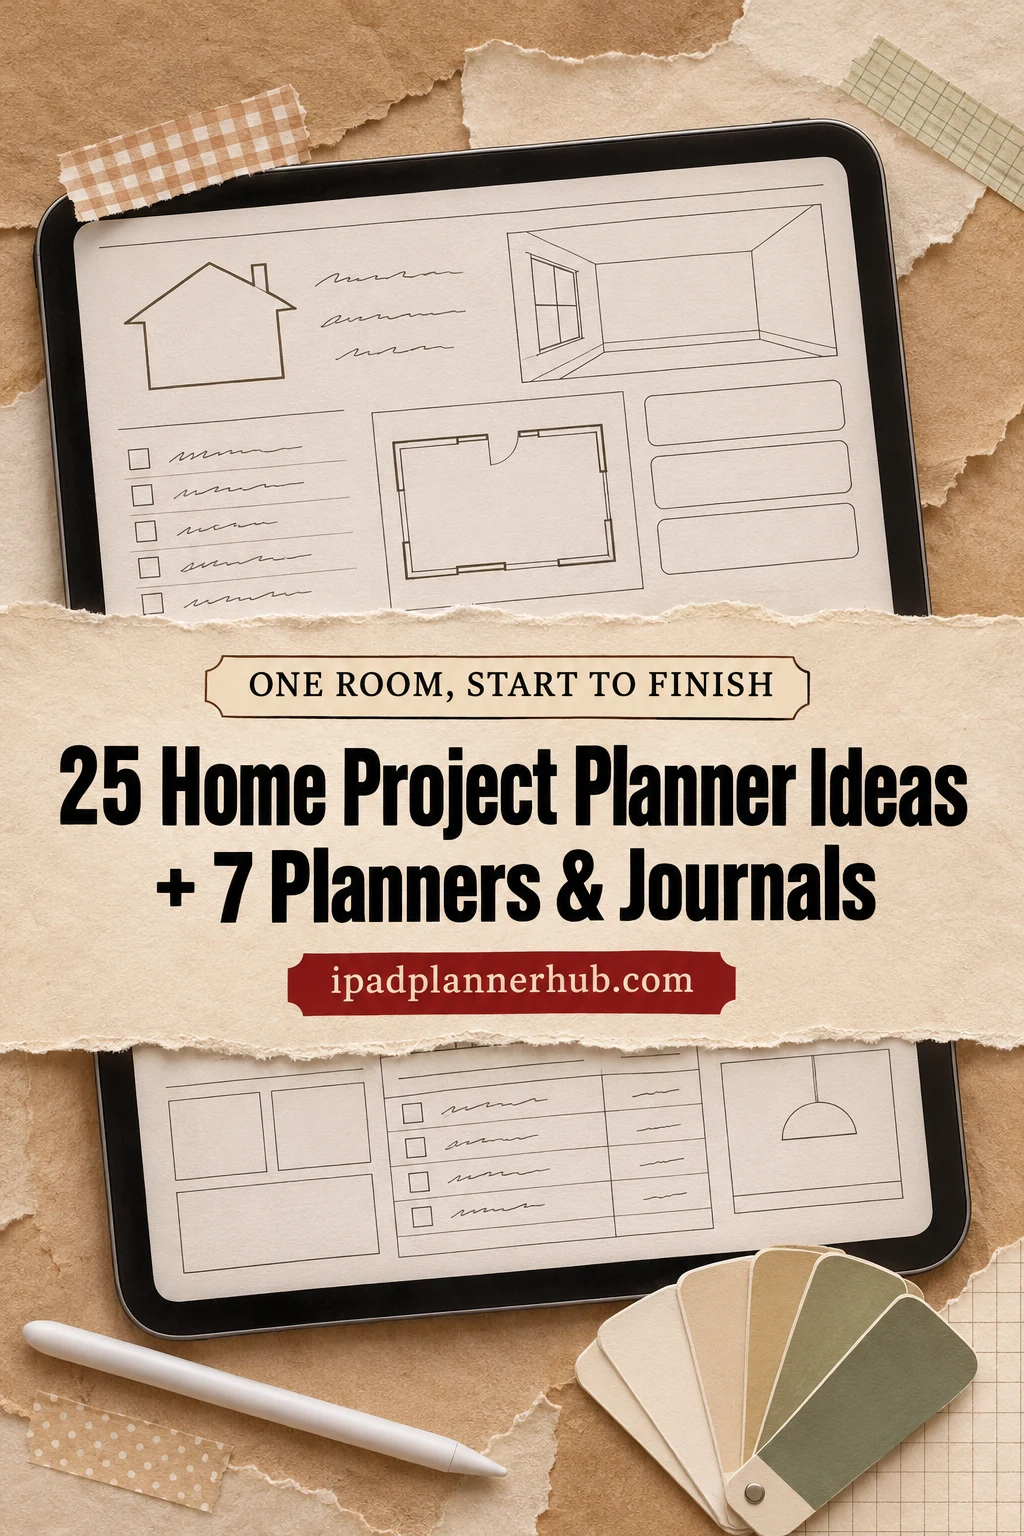
I suggest starting with one project page and adding detail when a decision needs it. The 25 ideas below follow a small desk-corner refresh from the first photo to the last return. They are pages you create yourself, with seven adaptable planners and journals to choose from; none is presented as a ready-made renovation system.
Pick a Starting Page for Your Home Project
If you already have blank pages in an iPad notebook, start there. A new template is useful when its layout solves a problem you actually have: fitting tasks on one overview, separating room details or keeping delivery dates visible. You do not need all seven options.
- One short update: use a project overview and a task list.
- Several purchases to compare: choose columns and a grid page, then add an order reference to each item.
- Many conversations or changes: leave room for dated notes and a simple index.
TL;DR: Seven adaptable options for a small home update: three project sheets, a sectioned notebook, a compact calendar journal, a ruled diary and dark paper layouts. Choose one starting point; you create the room-specific fields.
Quick Picks
- Best for setting project limits: Project Planner: Printable & Digital
- Best for a compact task dashboard: Project Planner Printable
- Best for a task list with a sketch: Digital Project Planner Printable
- Best for measurements and comparisons: Digital Notebook
- Best for delivery dates: Undated Cute Orange Bullet Journal
- Best for a project decision diary: Digital Ruled Journal
- Project Planner: Printable & Digital – Best for setting project limits
- Project Planner Printable – Best for a compact task dashboard
- Digital Project Planner Printable – Best for a task list with a sketch
- Digital Notebook – Best for measurements and comparisons
- Undated Cute Orange Bullet Journal – Best for delivery dates
- Digital Ruled Journal – Best for a project decision diary
- Dark Mode Digital Notebook: Gold Theme – Best for a dark two-column ledger
Best for setting project limits
1. Project Planner: Printable & Digital
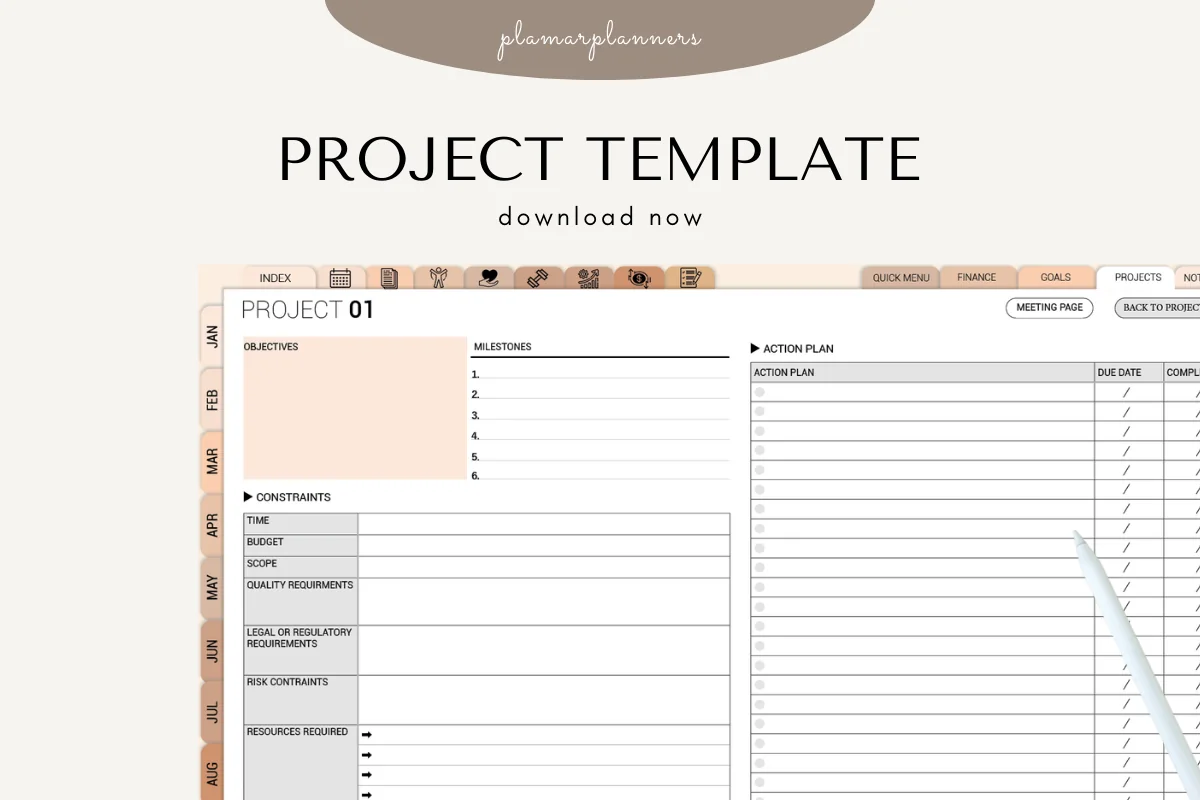
Orientation: LandscapeLayouts: Project overview with action plan
Best for: a single overview of the room update. Designed by Plamarplanners.
- Objectives and milestones beside an action-plan table
- Constraints for time, budget, scope and resources
- Digital PDF for GoodNotes, Notability or Xodo
I like the separate spaces for objectives, milestones and constraints: they keep a desk refresh from growing into a whole-office makeover. Use the action plan for next steps and keep measurements or lengthy supplier notes on a separate page. The seller lists seven page types: project overview, task breakdown, milestones and deadlines, resources and budget, notes and brainstorming, progress tracking, and priority actions. The gallery shows the overview in several colors; check the full page set with the seller before buying if one of the other layouts is essential. Treat the pictured tabs as navigation to check in your annotation app.
Best for a compact task dashboard
2. Project Planner Printable
Orientation: LandscapeLayouts: One project layout; four PDF sizesDates: Undated
Best for: seeing tasks and deadlines on one page. Designed by Tas Creative Studio.
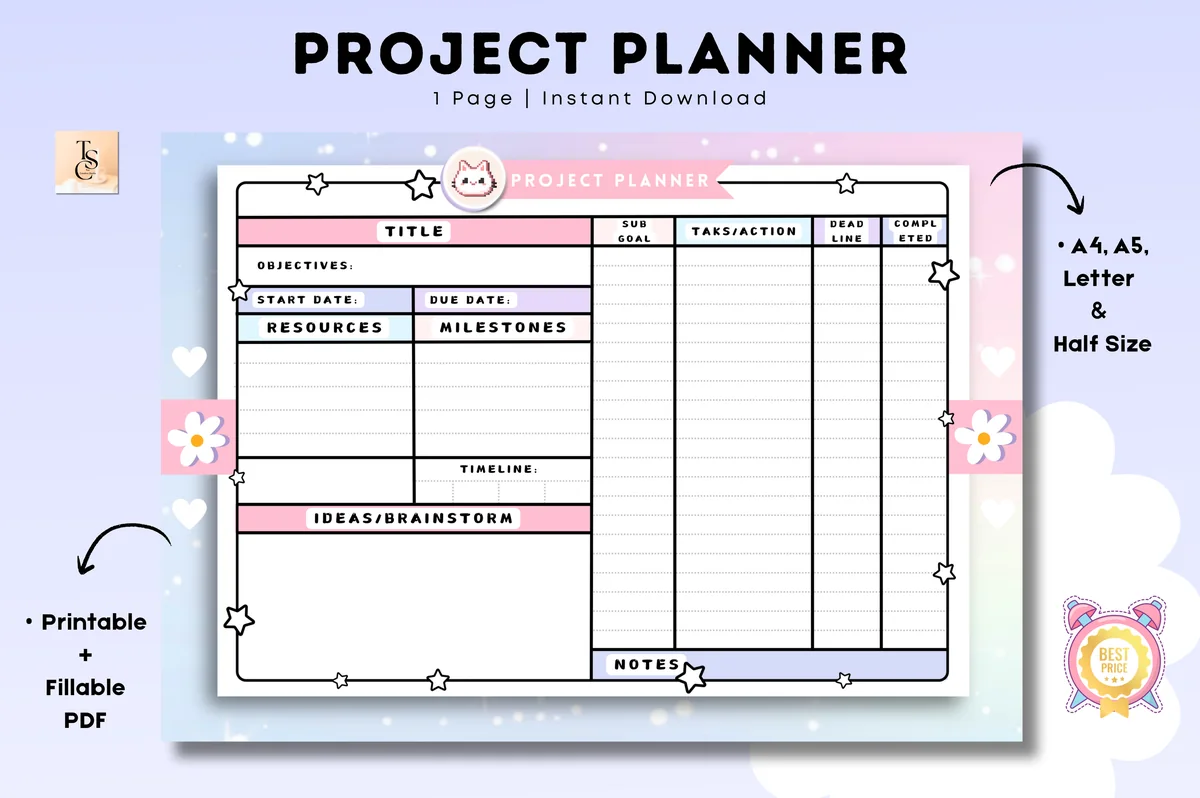
- Objectives, resources, milestones and timeline fields
- Subgoal, task/action, deadline and completed columns
- A4, A5, Letter and Half Letter files; GoodNotes and Notability supported
Each task sits beside its deadline and completion mark, making it easy to separate ordering a shelf from clearing space for it. This is a compact dashboard for a short update. Decorative borders and narrow columns leave little room for delivery notes, which belong on a separate page. The four PDF sizes share one layout; check form-field behavior in your iPad app before relying on typed entries.
Best for a task list with a sketch
3. Digital Project Planner Printable
Orientation: PortraitLayouts: Two-page PDF; task list and grid
Best for: pairing a short checklist with a rough room sketch. Designed by PlannerPlanet.
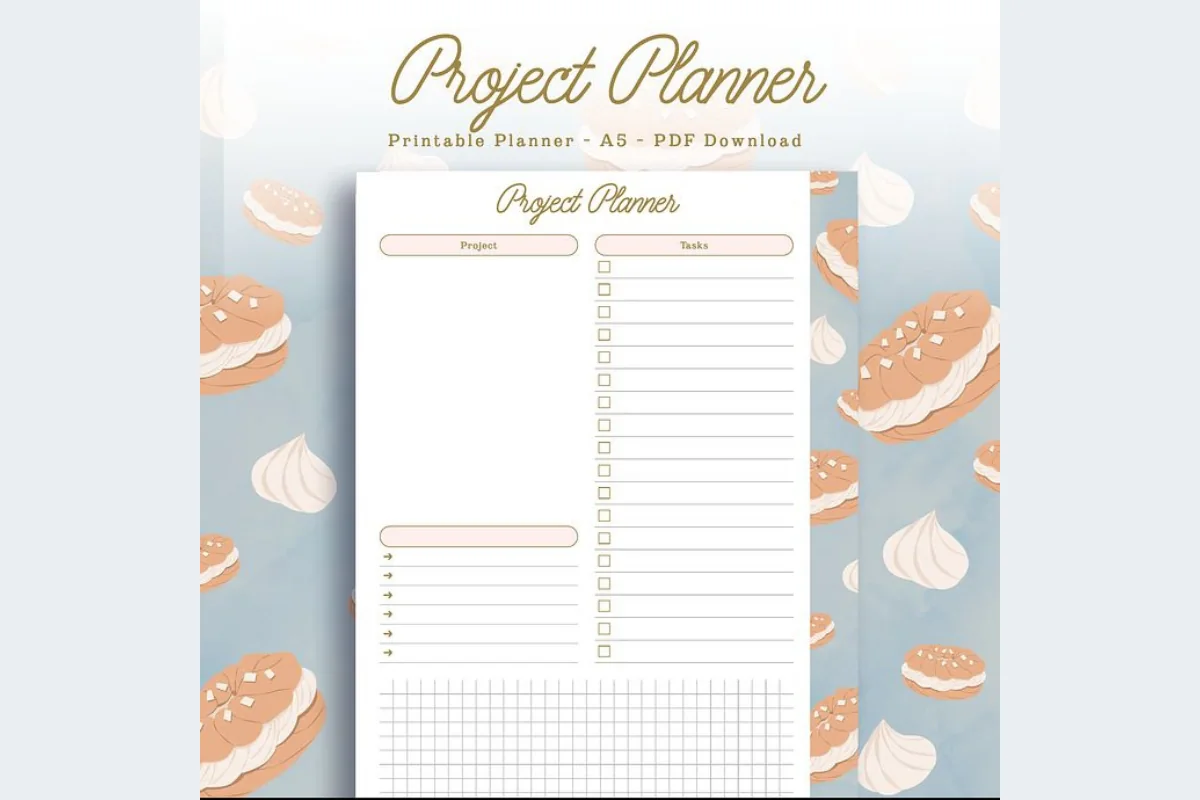
- Project heading and checklist column
- Open writing area with short arrow-marked lines
- Grid area pictured below the notes; GoodNotes and Notability compatibility
A checklist beside an open area is a useful fit for a modest layout decision. Put the two shelf options in your notes, then mark their positions on the grid as a rough reference. The visible grid is an organizing surface, not a measurement engine. This two-page option is smaller in scope than the sectioned notebook; it suits a short task list, but long receipts and quote histories need their own space.
Best for measurements and comparisons
4. Digital Notebook
Orientation: LandscapeLayouts: 16 note templates; 12 sections
Best for: keeping room details in separate sections. Designed by Shades of Zen.
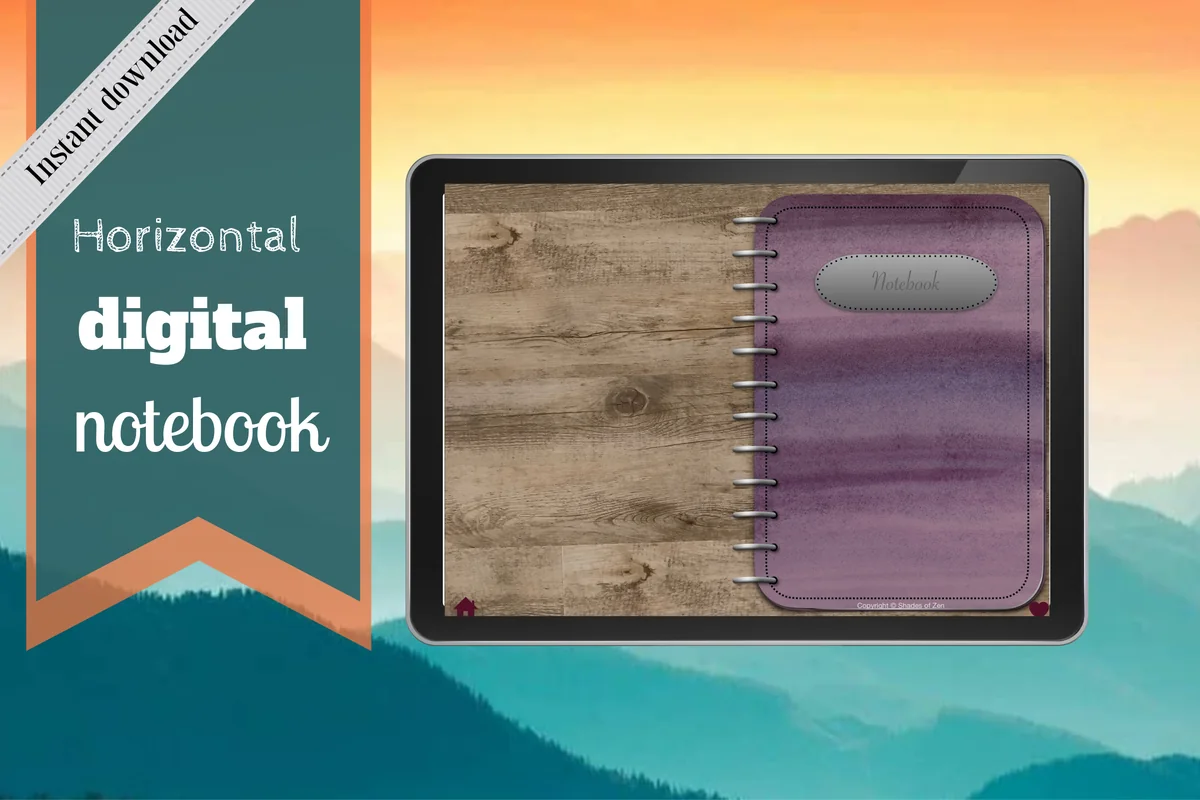
- 12 expandable sections with hyperlinked tabs
- 16 note templates including graph, dotted, lined and Cornell pages
- Two-column layout pictured; GoodNotes import instructions included
The two-column pages are my strongest match for comparing purchases and keeping the reason for each choice. Use graph paper for a labeled sketch and another section for receipts and delivery notes. Twelve expandable sections suit a home reference book that continues beyond one room. You create the room names, order fields and checklist yourself. The seller describes hyperlinked tabs; their behavior in the purchased file has not been tested here.

Best for delivery dates
5. Undated Cute Orange Bullet Journal
Orientation: LandscapeLayouts: Calendar, weekly columns and decorated framesDates: Undated
Best for: tracking a few dates and brief project notes. Designed by digitaliya_studio.
- PDF bullet journal with clickable tabs
- Blank calendar and weekly columns pictured
- GoodNotes-format stickers; compact decorated writing areas
This is the lightest choice for a short delivery window: an empty calendar and a few brief lists. Put the order reference next to the delivery date, then keep the full receipt elsewhere. The orange frames leave less writing room than the general notebook. Choose it for a small update with only a few purchases, not as a complete renovation binder. Its included stickers are decorative extras rather than purchasing or budgeting tools.
Best for a project decision diary
6. Digital Ruled Journal
Orientation: PortraitLayouts: 366 ruled pages; month/day index
Best for: recording conversations and changes in date order. Designed by Island Tulip Designs Co.
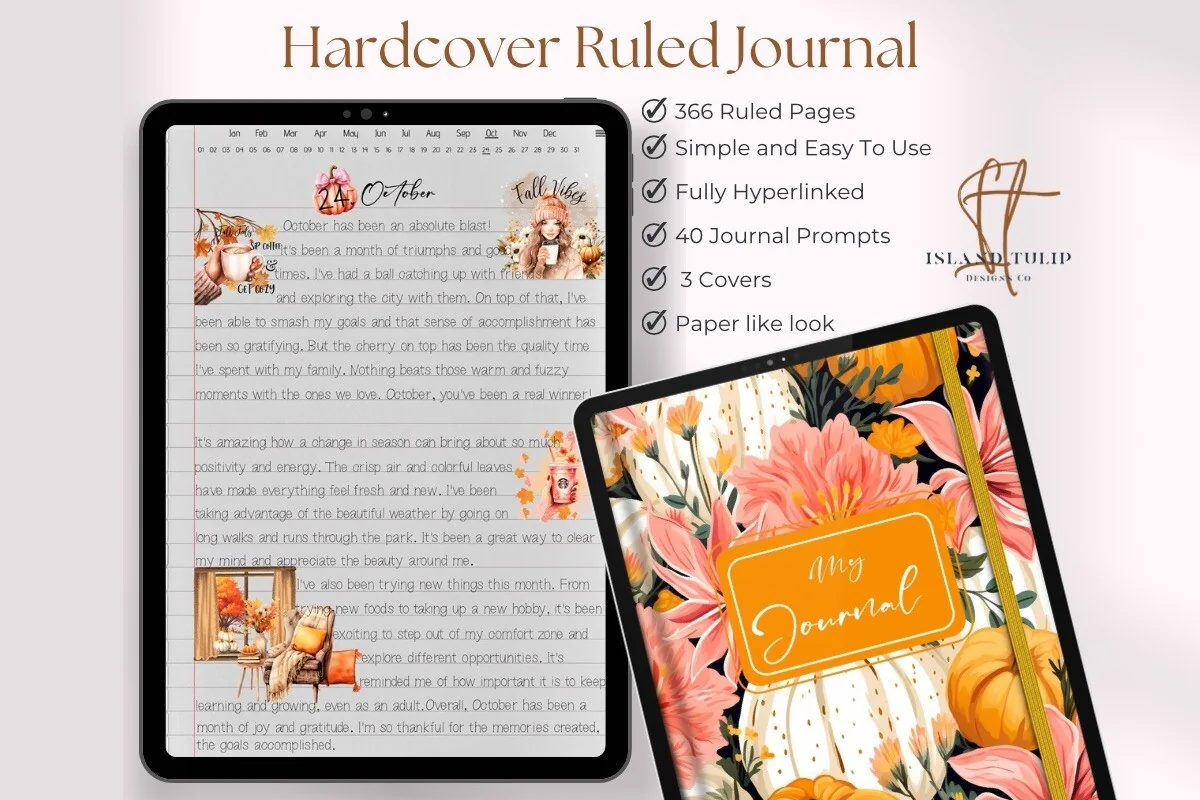
- 366 ruled pages and three cover choices
- Hyperlinked journal with a pictured month/day index
- 40 general prompts in PNG and precropped GoodNotes formats
Some decisions need a paragraph: why a quote changed, what a supplier said or why you chose a smaller desk. Ruled pages leave room for those details. The pictured index follows months and numbered days, so add a separate order locator for finding purchases quickly. The included prompts are general journaling extras; create your own home-project headings.
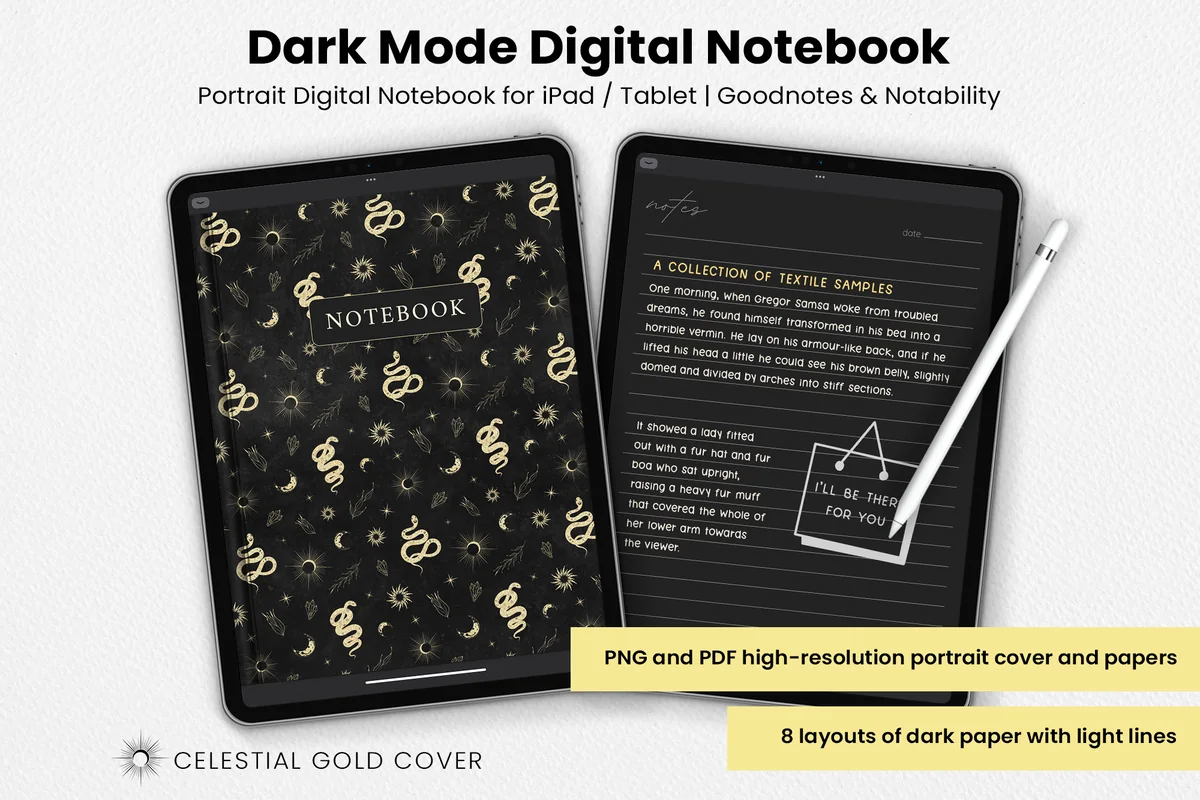
Best for a dark two-column ledger
7. Dark Mode Digital Notebook: Gold Theme
Orientation: PortraitLayouts: 8 dark paper layouts
Best for: writing order comparisons and lists on dark pages. Designed by catsquills.
- Columns, to-do, numbered list, dots, square, lines, notes and habit tracker layouts
- Celestial gold cover with dark pages and light lines
- PNG and PDF formats for GoodNotes or Notability
Use the columns for an ordered/received record and square paper for dimensions beside a sketch. The practical distinction is the dark page set, with light lines and a gold celestial cover. Check your preferred pen colors on a sample page before filling the project. Keep original receipt files accessible too, since a small receipt image may be hard to read against dark paper.
Quick Comparison
| Option | Page structure | Home project use | Keep in mind |
|---|---|---|---|
| 1. Project Planner: Printable & Digital | Overview and constraints | Scope, milestones and next actions | Compact fields; add detail pages |
| 2. Project Planner Printable | One-page dashboard | Assign tasks and check deadlines | Four sizes, not four layouts |
| 3. Digital Project Planner Printable | Checklist plus grid | Link purchases to a rough sketch | Not a scaled design tool |
| 4. Digital Notebook | Sectioned notebook | Room measurements and option comparisons | You create every home-project heading |
| 5. Undated Cute Orange Bullet Journal | Calendar and small frames | Deliveries, shop visits and return dates | Limited room for long notes |
| 6. Digital Ruled Journal | Ruled pages in date order | Quote calls and reasons for changes | Add an order index manually |
| 7. Dark Mode Digital Notebook: Gold Theme | Dark columns and grid | Order ledger and handwritten sketches | Check pen contrast on dark paper |
25 Home Project Planner Ideas, From First Measure to Finished Room
Use the following groups as a menu, not a requirement to build 25 separate pages. Several ideas can share one spread. For the desk-corner example, combine the brief and sketch, give orders their own page, and add a short closing checklist.
Define the Update Before Shopping1–5
- 1Write the problem you want to fix. Describe the inconvenience, not the product you hope to buy: “The desk has no clear surface for writing” is more useful than “Buy storage.” Add where and when it happens. That sentence becomes a test for each purchase: does this change solve the original problem, or just introduce another attractive object?
- 2Name the people and activities the space serves. List who uses the corner and the activities that must fit. A shared desk may need room for a laptop, handwritten notes and a place to leave someone else’s things untouched. Put a simple priority beside each activity. This keeps a layout decision tied to daily use instead of a reference photo.
- 3Separate the essential change from the wish list. Create two short lists: “This project” and “Later.” Clearing the desktop and adding a freestanding shelf might belong in the first; replacing every piece of furniture can wait. Add one sentence defining completion. I like “The desk can be used without moving boxes” because it is something you can check.
- 4Take a useful before-photo. Save a photo from an angle you can repeat, then add a caption naming the problem area. A second close-up can show the cable pile or crowded shelf. Keep the images with the project name so they are easy to locate later. They are a reference for comparison, not a substitute for actual measurements.
- 5Set a stop rule. Write the limit that would make you pause: a purchase above your chosen spending allowance, a missed delivery window or work that needs professional advice. Keep the rule next to the project brief. For the desk corner, it could be “No ordering until the existing desk and delivery route are measured.”
Measure and Compare Before Ordering6–10
- 6Make a dimension record with units. Draw a rough plan and label width, depth and height where relevant. Include the unit on every measurement and distinguish your measured space from the seller’s product dimensions. Leave an unchecked box beside figures that need a second look. A notebook grid organizes your labels; it does not turn the sketch into a scaled construction drawing.
- 7Record the route into the room. Note doorway and access questions before selecting a bulky item. Keep delivery instructions separate from the room sketch: which entrance, what floor, and who must be present? If fit or delivery conditions are unclear, ask the seller or relevant professional rather than inferring an answer from a product photo. Record the response beside the order.
- 8Inventory what will stay. List the desk, chair, lamp and storage you intend to keep. Add their relevant dimensions and any condition notes. This prevents comparing new furniture against an imaginary empty room. For the desk-corner example, the existing chair’s movement is part of the layout decision, even if the chair itself is not being replaced.
- 9Compare two options on the same questions. Use two columns headed Option A and Option B. Give each the same rows: dimensions, delivered cost, storage space, stated return terms and an unresolved question. Write the reason for the choice below both columns. If neither option answers the original problem, keep looking instead of choosing whichever has the prettier photo.
- 10Keep references and permission questions together. Save the source beside a color sample or inspiration image. Add what you like about it, such as an open surface or a particular material, rather than treating the whole room as a shopping list. For a rental or shared home, keep any permission request and answer here before making a change that depends on it.
Give Every Purchase a Traceable Record11–16
- 11Assign each purchase a short ID. Use a small identifier such as DESK-01 and repeat it on the order note, receipt filename and delivery entry. It is a label you create, not an automated link. A useful record lets you answer “Which shelf is this?” without opening several nearly identical product screenshots. Add the exact product name and variant beside the ID.
- 12Write the full cost beside the estimate. Keep an estimate column and an actual column, including shipping and other charges shown at checkout. Enter figures manually and note the currency if it could be ambiguous. Leave unknown costs visibly blank or marked “ask,” rather than treating them as zero. If a total changes, retain the earlier estimate so the difference is understandable.
- 13Save the quote question as well as the answer. For any outside help, record the question you asked, who answered, the date and what the quoted amount includes. Keep unclear items in a separate “waiting for reply” list. A planner can organize this conversation; it cannot determine technical suitability or replace professional advice. Avoid copying an estimate into the budget without its scope.
- 14Make a receipt locator. Write where the original receipt lives: email subject, folder name or filename. You can place a small reference image on the page too, but keep the original file available for details. The locator should use the same purchase ID as the order page. This is especially useful when one shop sends order, dispatch and receipt emails separately.
- 15Separate ordered, expected and received. Give each order three distinct fields. An order confirmation is different from a delivery estimate, and an estimate is different from an item arriving. Add the date you last checked the information. In the desk example, the shelf can be “ordered” while the room setup task remains blocked until it has actually arrived.
- 16Record the seller’s return deadline and next action. Read the terms for the actual purchase and record the relevant date, conditions and source. Add a reminder in a separate calendar app if you need an alert; handwriting a date in a PDF does not schedule one. Leave space for the return authorization or postage reference if the item goes back. Do not assume all shops use the same return window.
Plan the Work Around Real Life17–21
- 17Turn milestones into visible checkpoints. Use short checkpoints such as “layout chosen,” “items received” and “desk ready for use.” Under each, write the next physical or administrative action. A milestone is more helpful when you can tell whether it is complete. Keep the list short enough to read at a glance instead of copying every tiny task into both places.
- 18Show what has to happen first. Write a simple chain: check dimensions → choose shelf → order → inspect delivery → arrange the corner. Add a waiting symbol beside the blocked step. This is an organizational sequence, not installation advice. When a delivery slips, the chain tells you which later tasks need rescheduling and which independent tasks can still go ahead.
- 19Reserve a realistic session and a backup. Choose a time window that fits the household, then record a second option if a delivery or another commitment moves. Define what you expect to finish during that session. “Clear and photograph the desktop” is easier to plan than “Sort office.” Keep noisy or disruptive activities subject to the conditions that actually apply to your home.
- 20Plan where displaced things will go. Before clearing the corner, name a temporary place for the boxes, papers and lamp. Add a note about access that must remain available while the space is in transition. The temporary arrangement should have an end date or closing task. Otherwise, the planner may describe a finished desk while the rest of the room still holds its displaced contents.
- 21Keep a change log with a decision owner. Write the proposed change, the reason, its cost or timing effect and who needs to agree. For a shared room, name the person responsible for the final answer. Keep the original decision visible beneath the update. This makes “We changed our minds” a traceable choice instead of a mystery when the new item arrives.
Close the Project and Keep What You Learned22–25
- 22Inspect arrivals against the order. Use the product name, variant and purchase ID to check what arrived. Note visible discrepancies and save any relevant photos with the receipt. Follow the seller’s process for reporting a problem. Keep “received” and “accepted for this project” separate until you have checked the item against the information you ordered from.
- 23Make a last-small-jobs list. Gather the loose ends that can survive after the room looks finished: packaging to remove, an unsuitable item to return, a receipt to file and temporary boxes to empty. Give each an owner or next action. A short closing list is more useful here than starting another room project to avoid these unglamorous tasks.
- 24Compare the finished room with the brief. Repeat the before-photo angle and read the original problem statement. Can you use the desk without moving the boxes? Record what works and what still gets in the way after normal use. Keep the assessment specific to your own space; a tidy photograph alone does not show whether the everyday inconvenience has been resolved.
- 25Leave a handover note for your future self. Keep product identifiers, receipt locations, the item’s care instructions and one lesson for the next room. Write what you would repeat and what you would check earlier. Archive the project only after returns and loose ends are settled. Then the notebook becomes a usable home reference instead of a collection of abandoned shopping lists.
A Small Desk-Corner Example You Can Copy
This desk-corner planning example combines the ideas into four sections. Keep the entries short enough that you can update them when something changes.
- Brief: keep the existing desk and chair; clear a writing area; compare two freestanding storage options.
- Details: record measured space and access questions, then compare the two options on dimensions, delivered cost and return terms.
- Order: label the chosen item DESK-01; write its exact variant, receipt locator, expected date and return deadline.
- Close: inspect the item, arrange the corner, empty the temporary boxes and check the original goal after ordinary use.
You can combine the brief and milestones on a project sheet, or create all four sections inside a notebook you already own. If you need help choosing a broader planning structure, the project planner comparison covers that separate decision.
PDF Pages or an App for Your Home Project?
A PDF planner gives you a place to write and organize reference material inside a compatible annotation app. Plan to enter costs, statuses and dates yourself. Do not rely on a pictured checkbox, calendar or tab as evidence of automatic calculations, alerts or a contractor connection.
- Keep the notebook for context: measurements, choices, photos and the reasons behind a change.
- Set time-sensitive alerts separately: use the reminder or calendar tool you already trust for a delivery or return deadline.
- Keep originals accessible: receipts, seller terms and professional documents should remain readable outside a small planner screenshot.
FAQ: Planning a Small Home Update
How many home projects should I plan at once?
For a first notebook, choose one active room update and keep the rest on a later list. That is a practical starting rule, not a fixed limit. If you run several projects, give each a separate brief and purchase IDs so their orders and deadlines do not merge.
Can I use a bullet journal instead of a renovation planner?
Yes. Blank or lined pages can hold your brief, measurements, orders and closing checklist. Add your own headings and index. A dedicated template is worth considering when its layout saves repeated setup, but it does not supply the facts about your room.
Are these home project planner ideas PDF templates?
The ideas are page prompts you can create in an existing iPad notebook. The seven product options include PDF planners and journals, with their individual formats listed in the cards. They are adaptable starting points, not a package of 25 prebuilt home-project pages.
Will the planner calculate a budget or send return reminders?
Do not assume either feature. The options here are writing surfaces and planning layouts; no automatic budget calculation or reminder workflow has been tested. Record the full cost yourself and create a separate alert for any date you cannot afford to miss.
When should I bring in a professional?
Use these pages to organize questions, quotes and decisions. If the work calls for technical assessment, regulated work or a skill you do not have, get appropriate qualified help before proceeding. A sketch in a notebook is not an installation plan or a substitute for that assessment.
Finish One Room Before Expanding the List
The most useful home project planner ideas are the ones that help you make the next decision and close the last loose end. Start with the problem, keep each order traceable and return to your definition of done. One clear brief and a reliable receipt locator can be enough for a small update; add more pages only when the project needs them.
You May Also Like
This article contains affiliate links. If you buy through them, I may earn a commission at no extra cost to you. Read the affiliate disclosure.